Currently supports Claude Code, OpenAI Codex, Conductor, Cursor, and Devin.
Enable org-wide
Org admins can go to Code Review Settings at the organization level and scroll to the Default Coding Agents section to turn on Fix with your Agent for the org. The badge shows up on every PR review. Users who click it without having set up their own agent get walked through setup.Setup
Install the Greptile Bridge
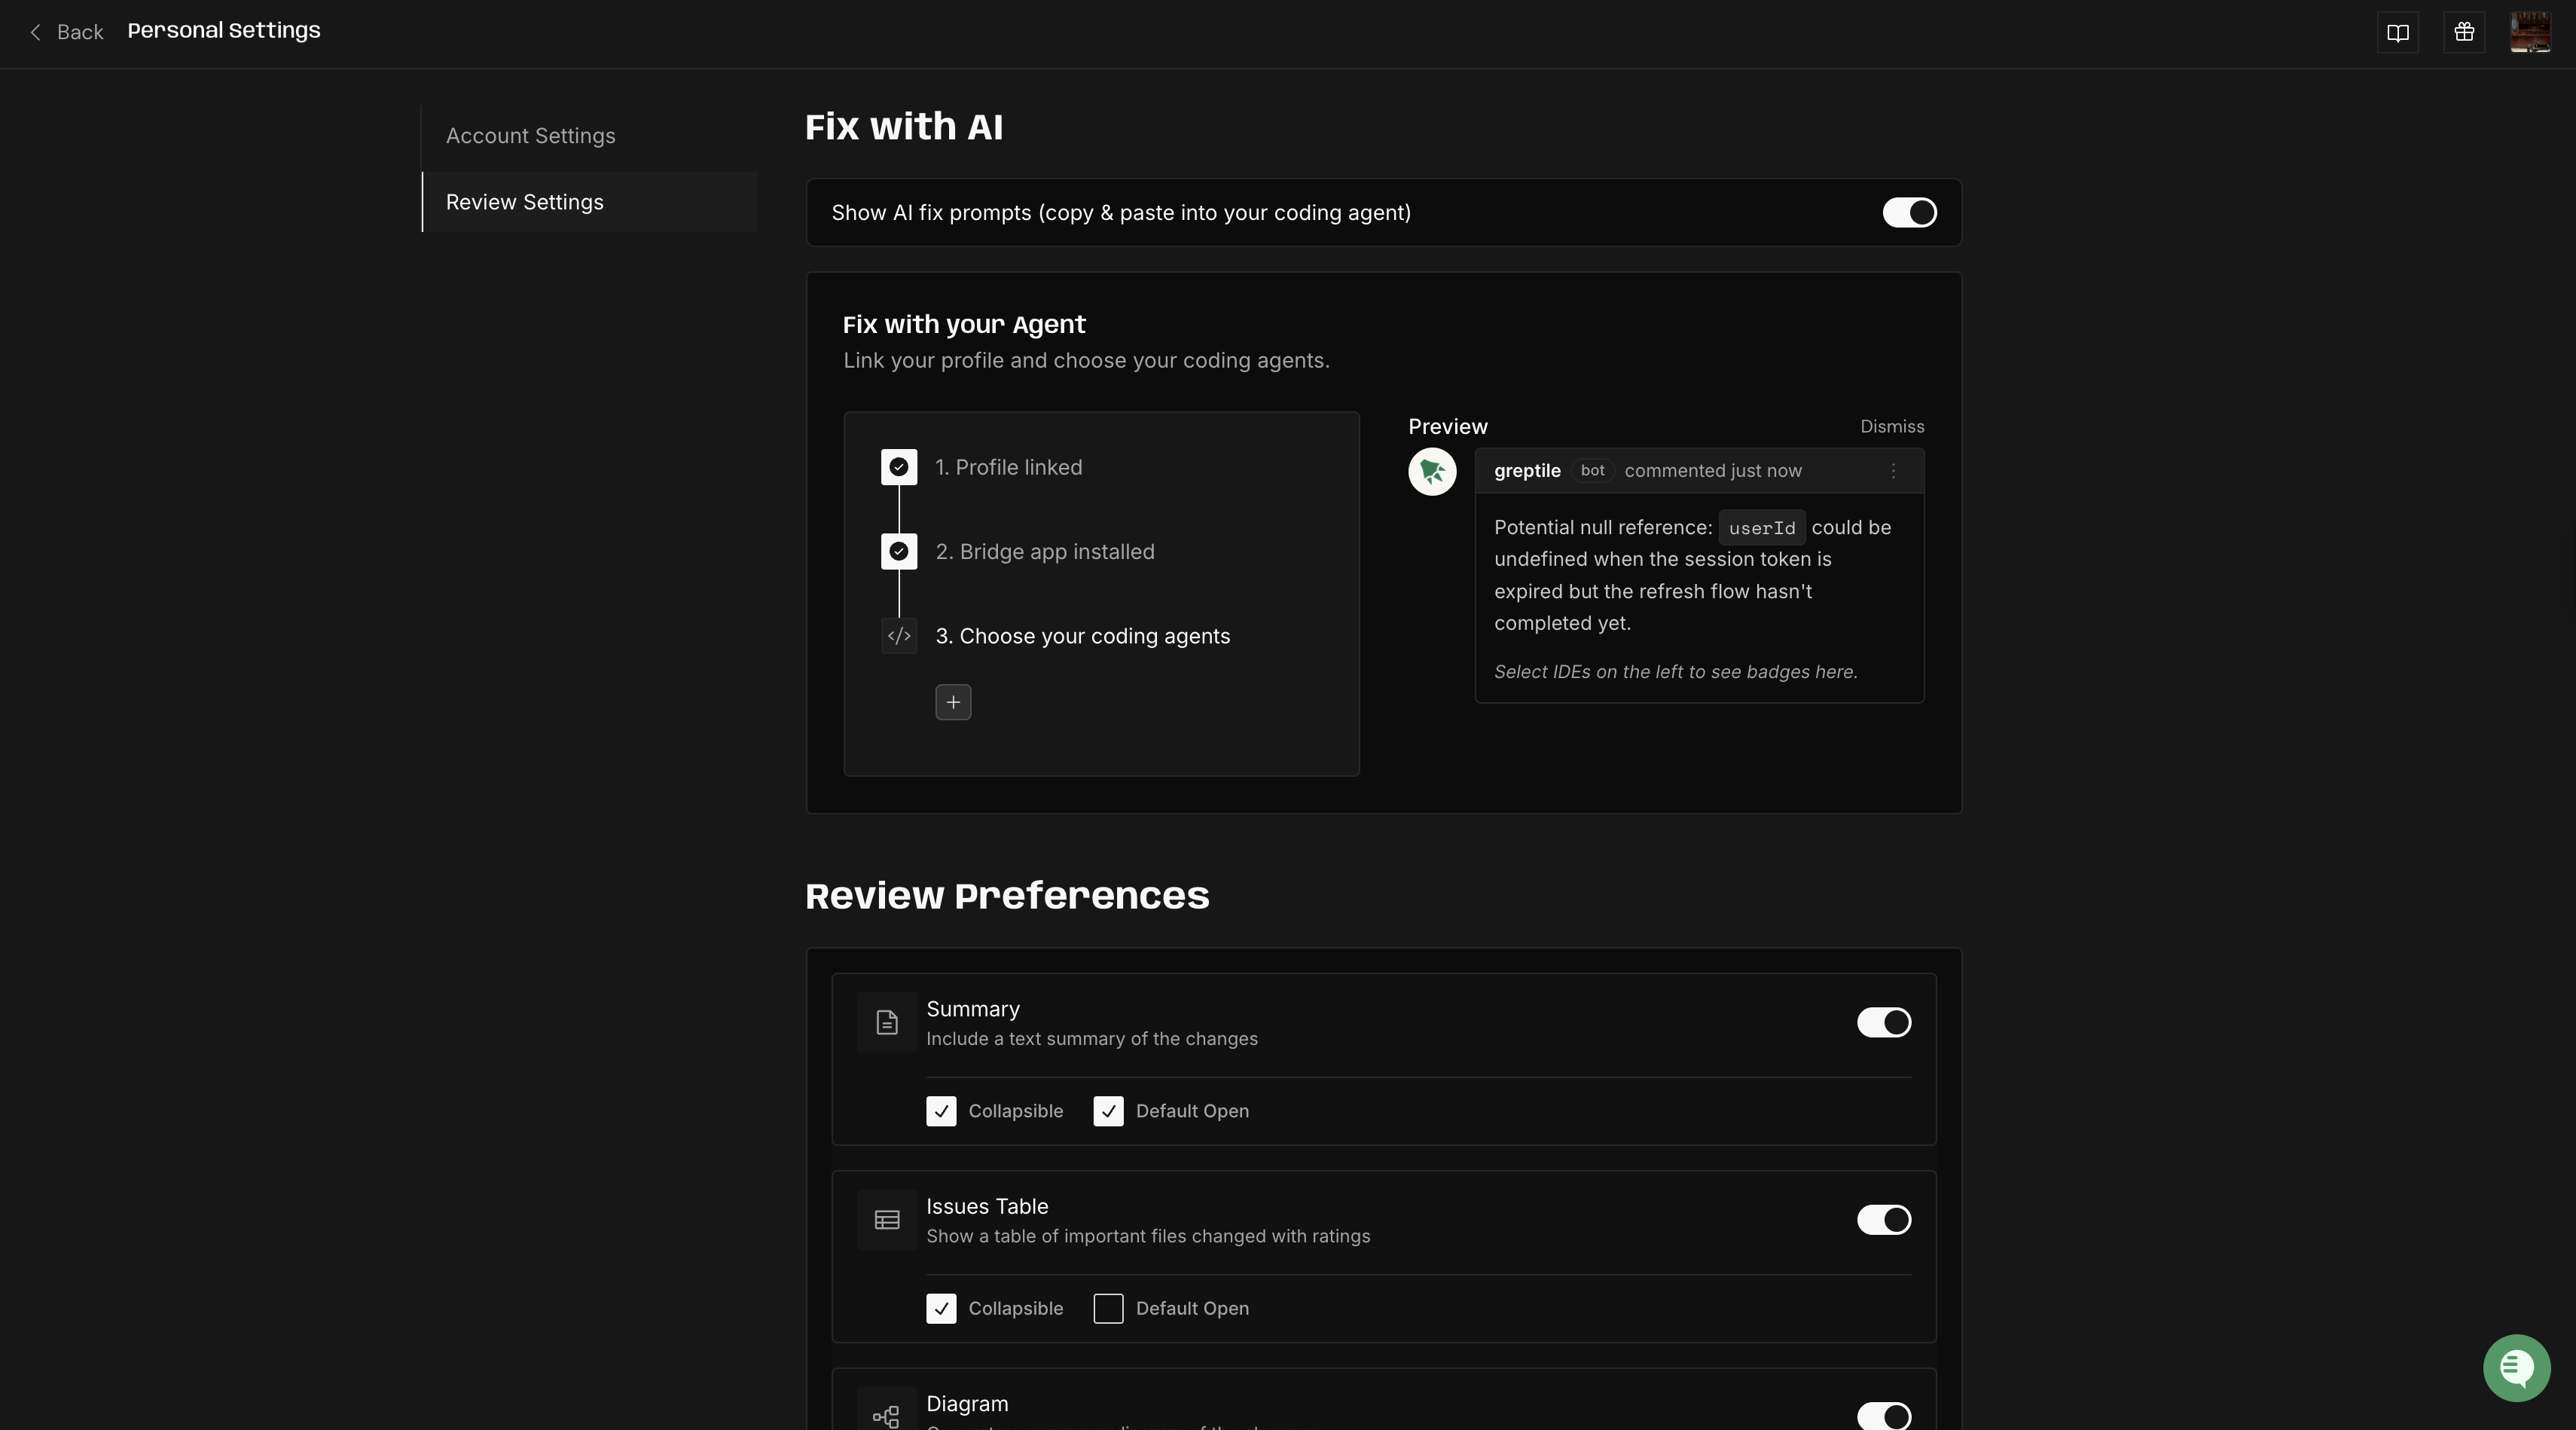
Click your profile icon in the upper-right corner of the page and select Settings, then go to Review Settings. Under the Fix with your Agent section, you’ll see a prompt to link your profile and to install the bridge app. The bridge is a small CLI that sits on your machine and routes fix requests from GitHub to your local agent.
Choose your coding agents
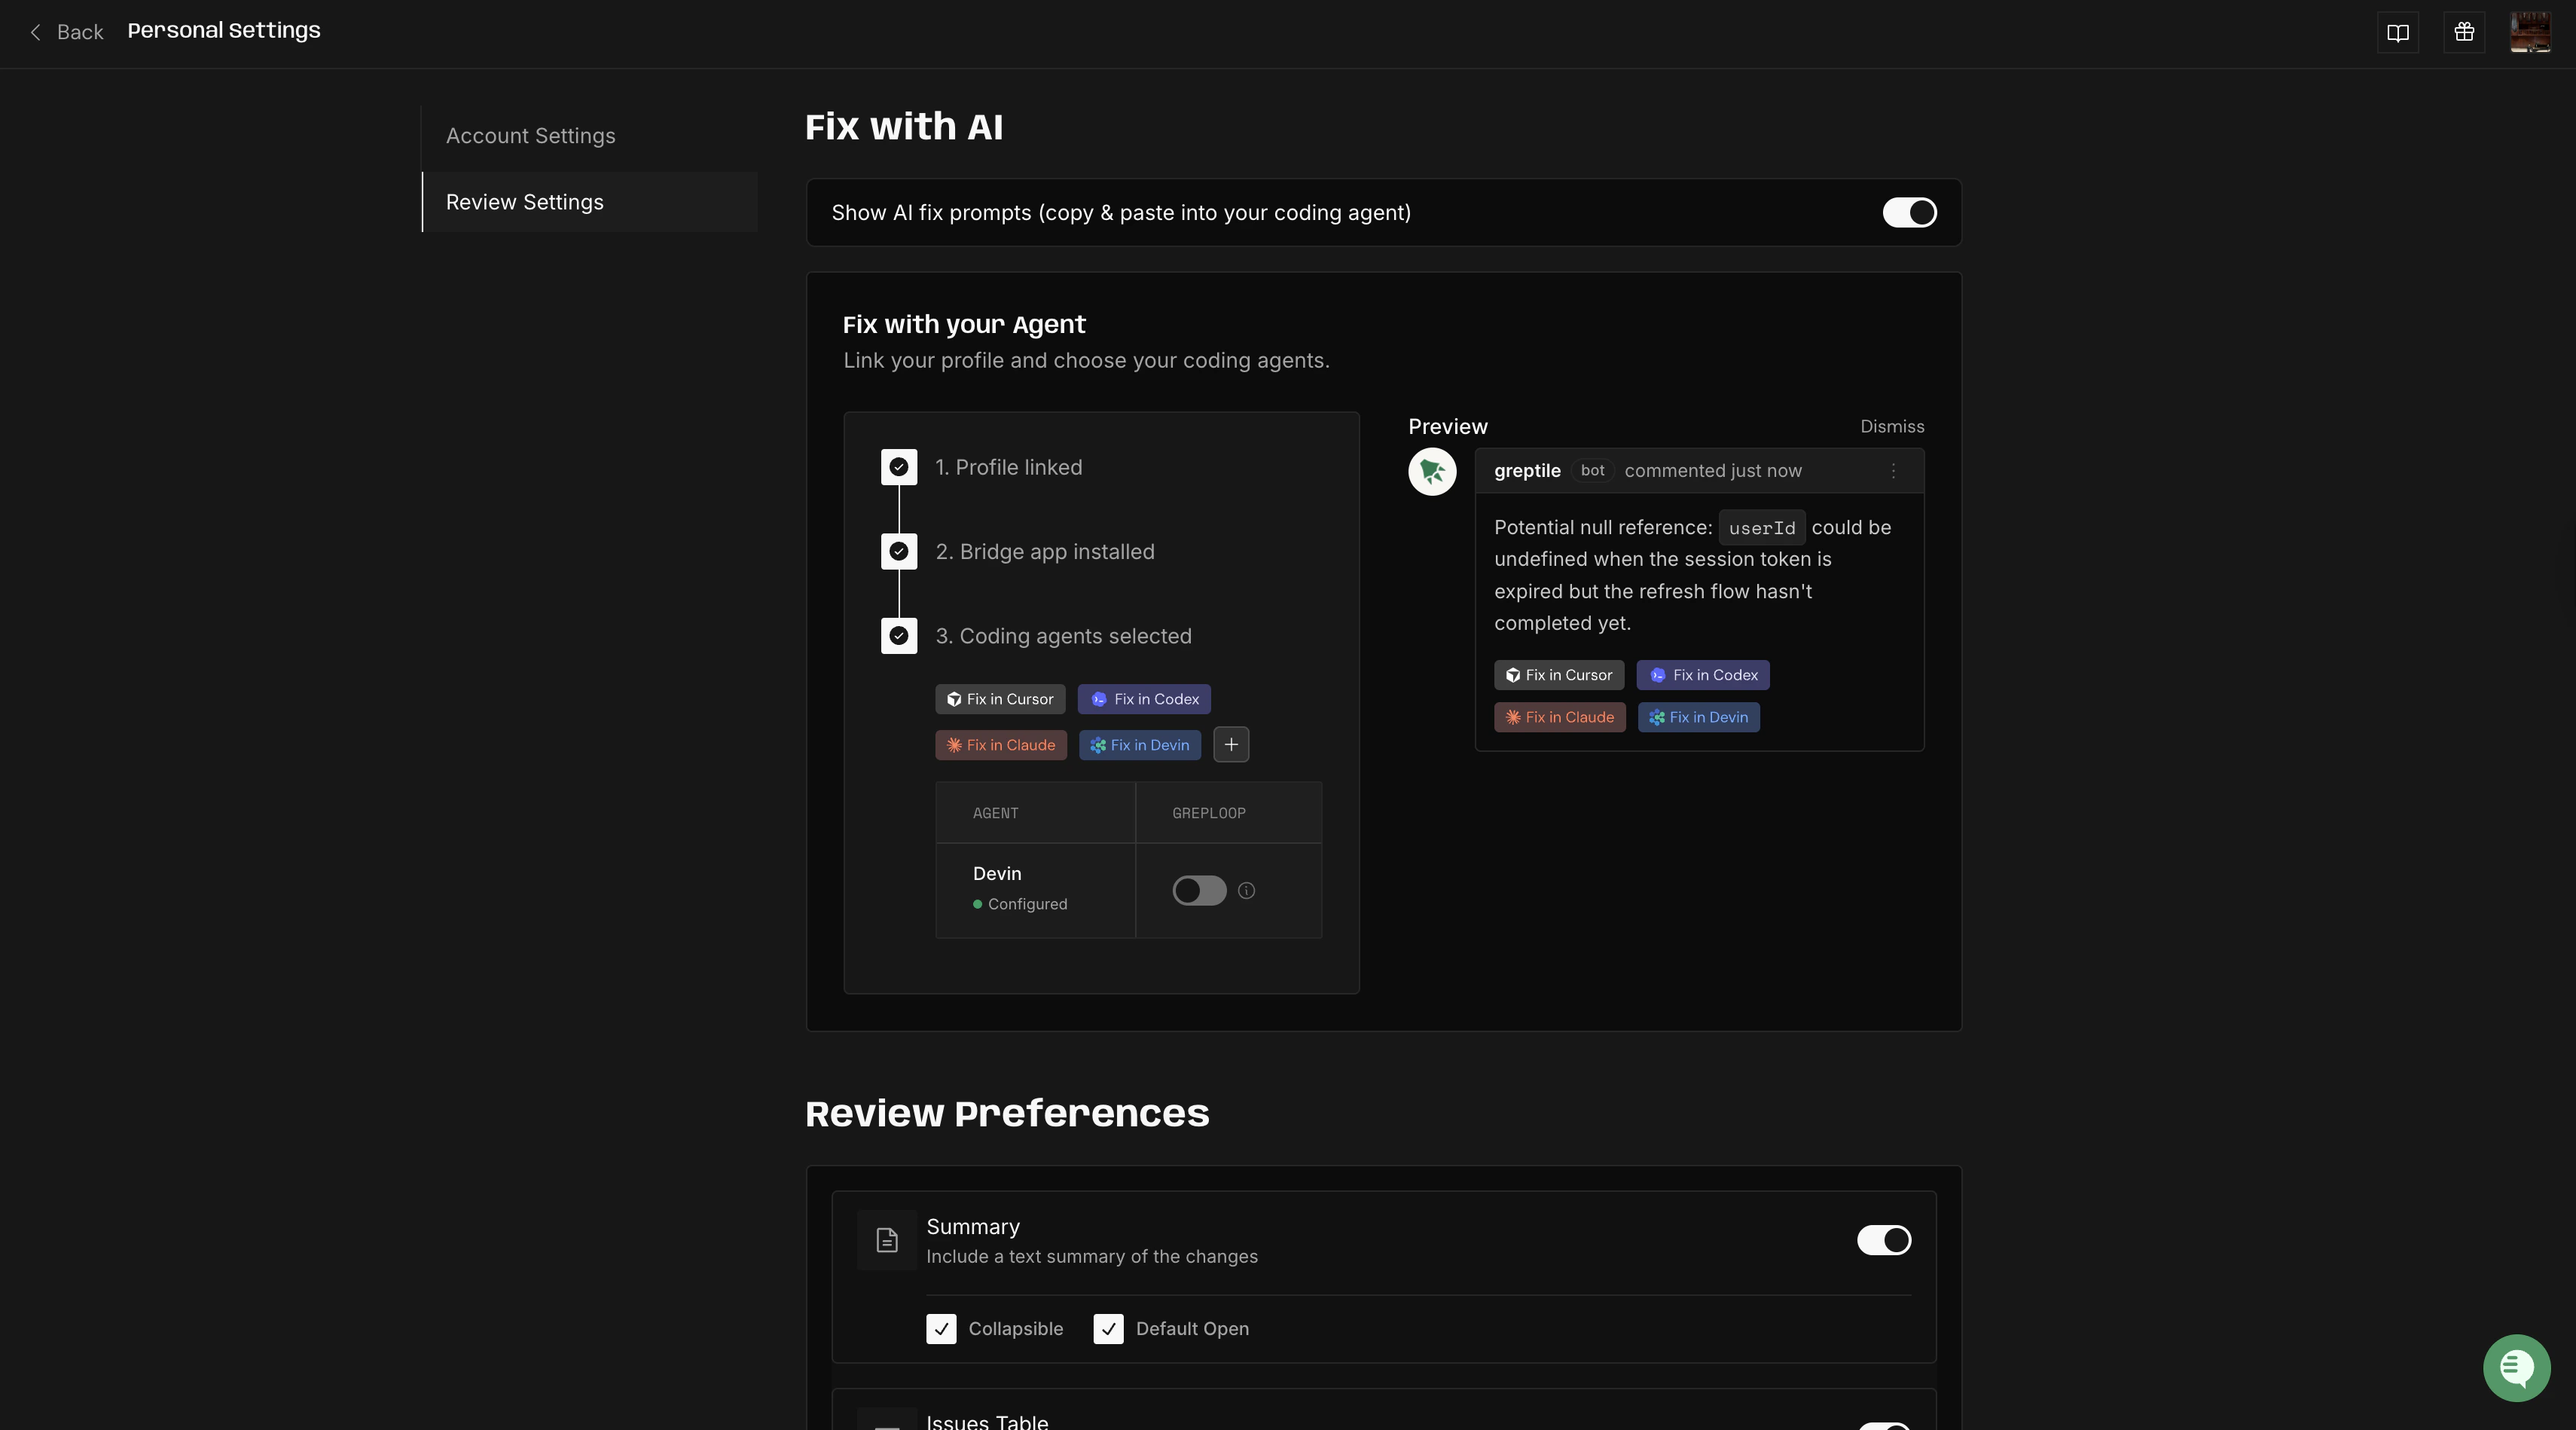
In the same section, click the Choose your coding agents dropdown and select the agents you want to use. You can pick from Claude Code, Codex, Conductor, Cursor, and Devin.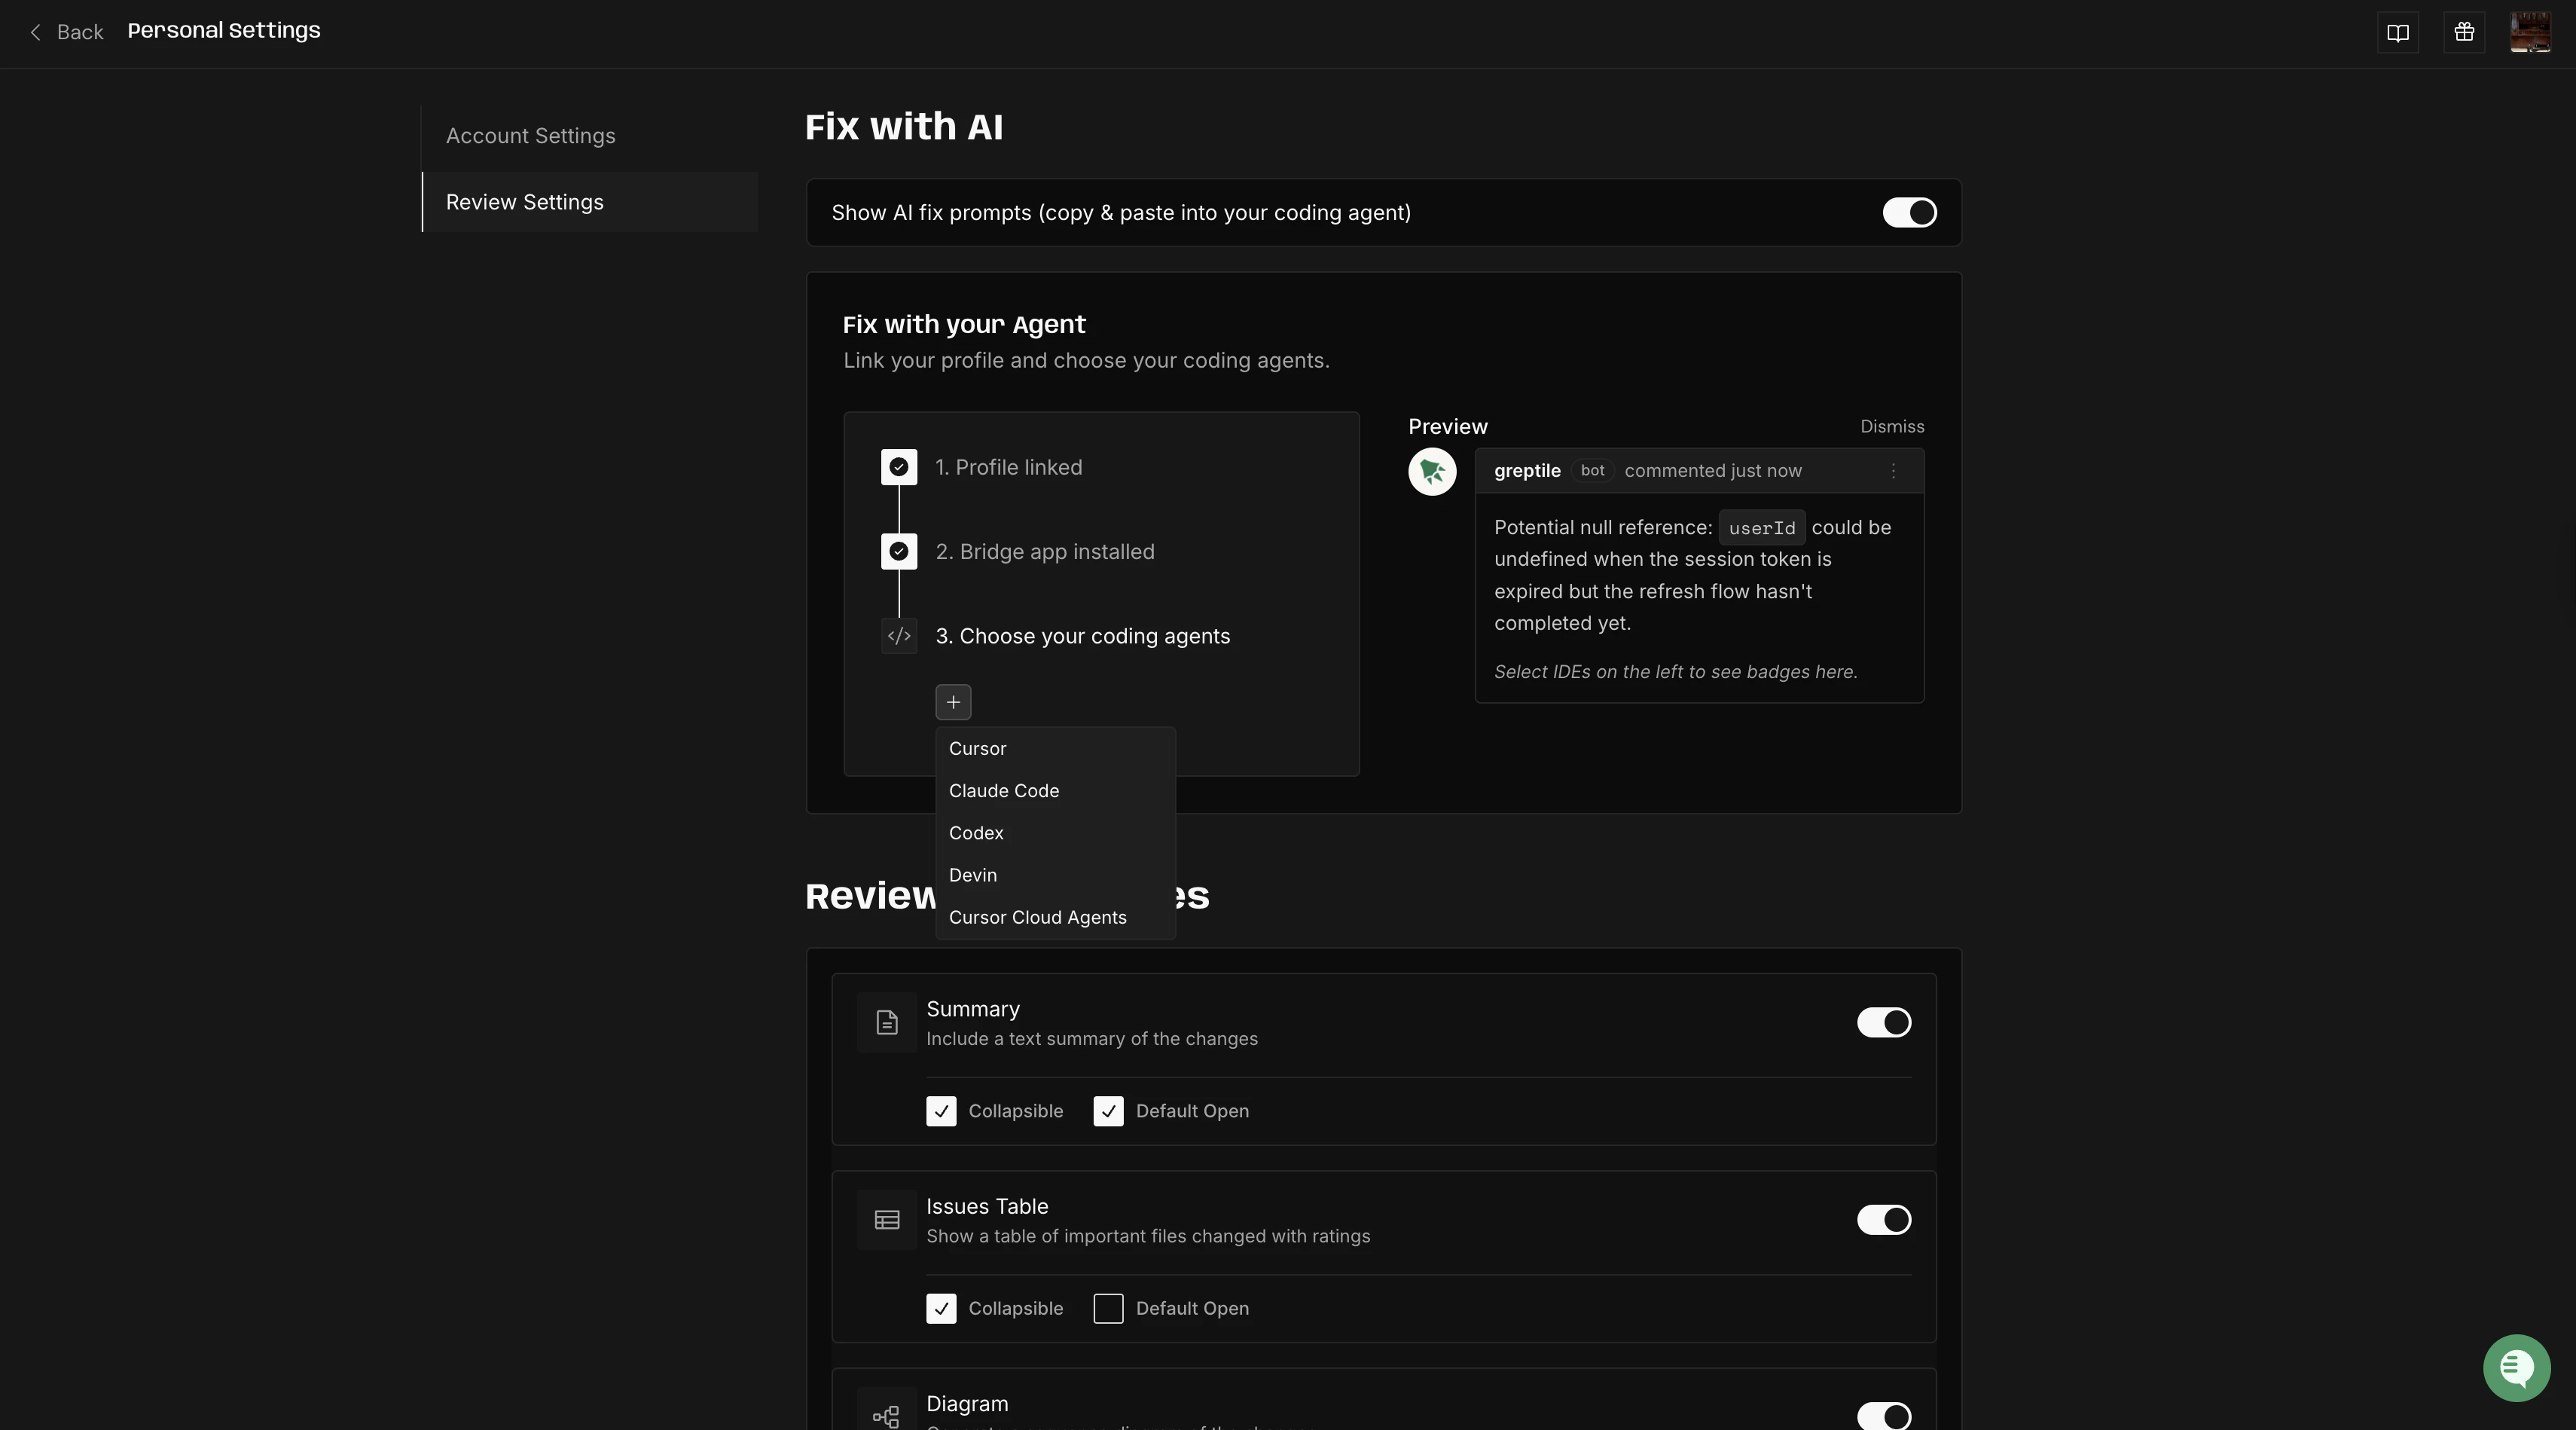
Using Fix with your Agent
Once setup is done, the flow looks like this:Greptile reviews your PR
When you open or update a PR, Greptile posts its review. Each inline comment gets a Fix with your Agent button, and the review summary has a Fix All button at the bottom that sends every issue at once.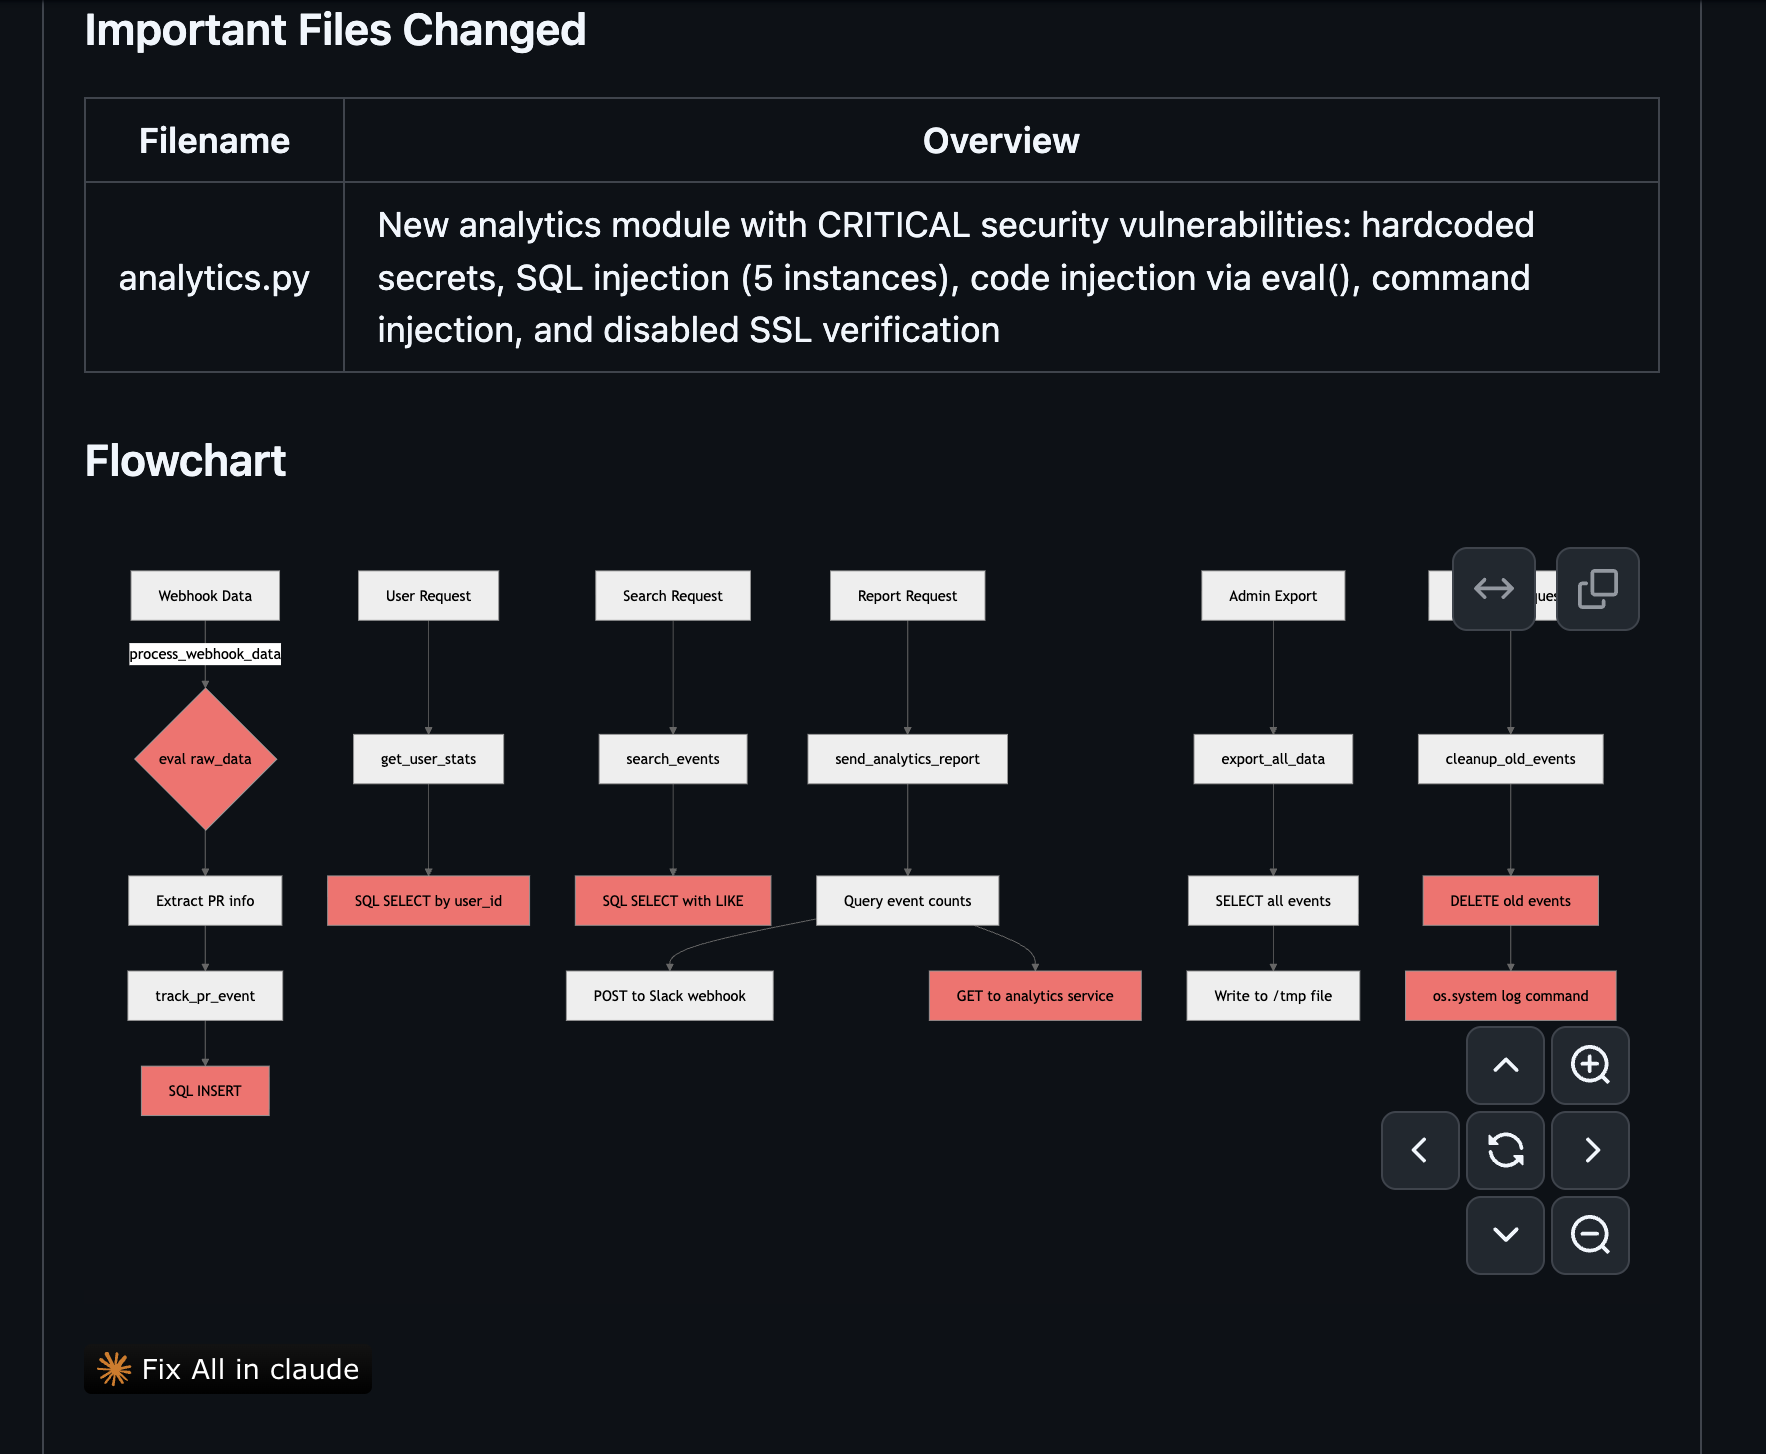
Click the button
Your browser asks permission to open Greptile Fix. Click Open “Greptile Fix” to continue. You can select Always open to skip this prompt going forward.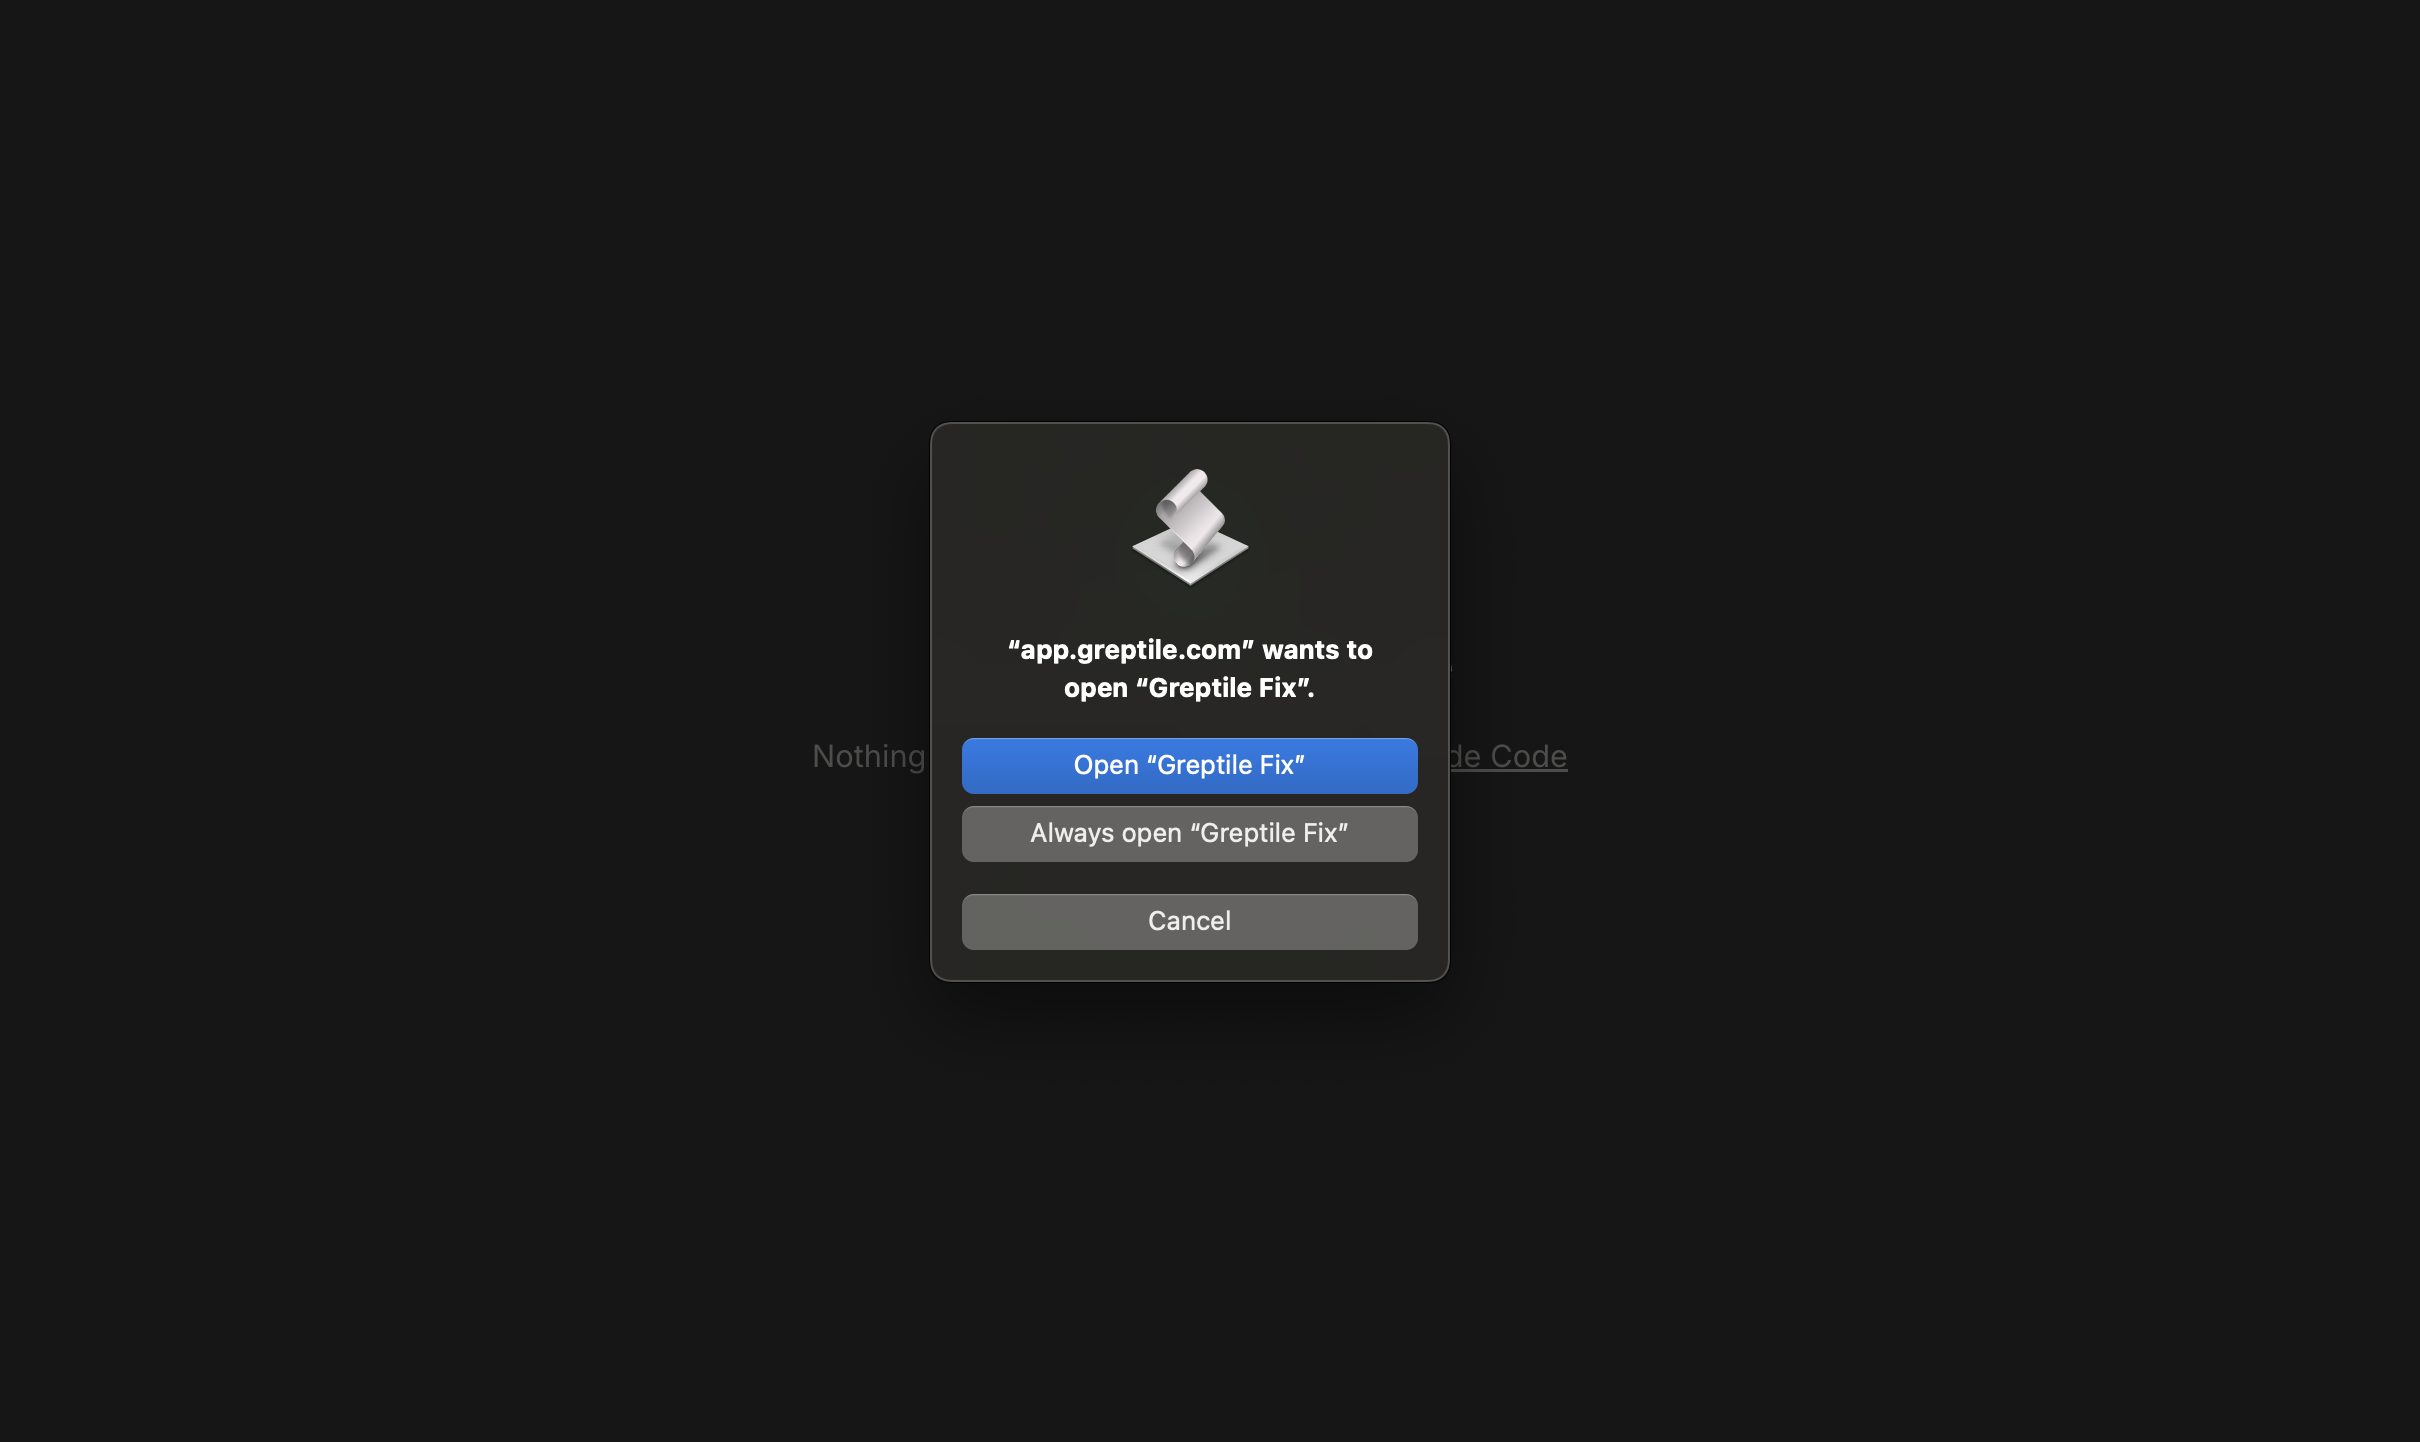
Point it to your local repo
Greptile Fix asks you to select the local directory where your repo lives. This tells it where to open your agent.
Your agent fixes the code
Your coding agent fires up with a detailed prompt that includes every flagged issue: file paths, line numbers, the review comment, and suggested code changes. The agent works through them one at a time.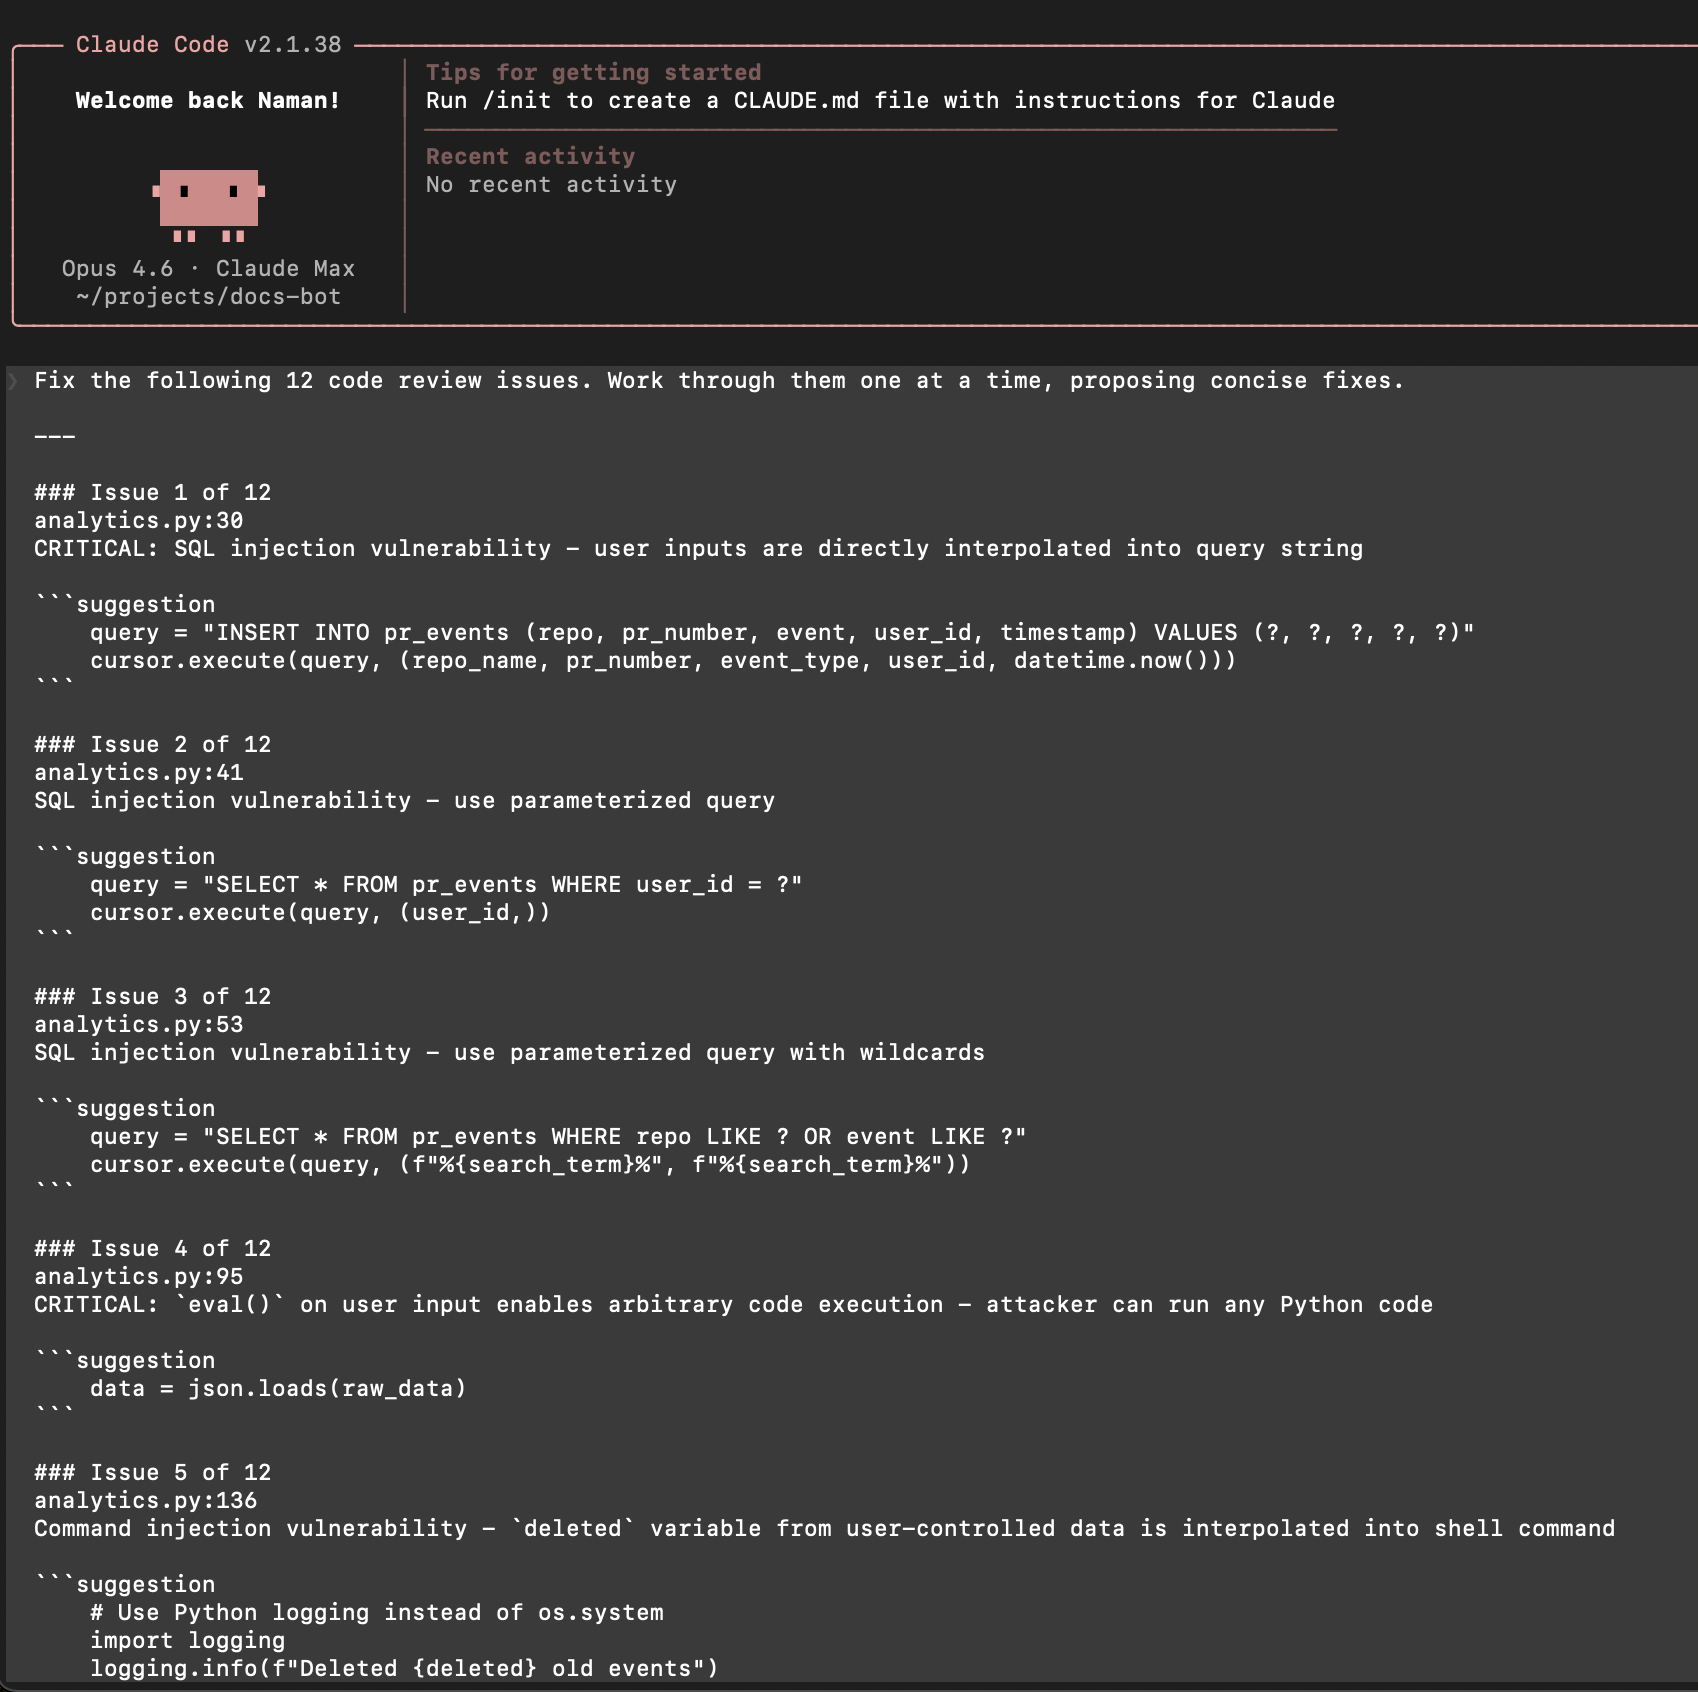
Troubleshooting
Button doesn't appear on review comments
Button doesn't appear on review comments
Browser dialog doesn't appear after clicking Fix
Browser dialog doesn't appear after clicking Fix
This usually means the bridge isn’t installed or local network access isn’t enabled. Reinstall with
npm install -g greptile and check that local network permissions are granted in your dashboard settings.Agent applies the wrong fix
Agent applies the wrong fix
The agent uses the review comment and suggested code as guidance, but it may interpret things differently depending on context. Always review the diff before committing.